Showing posts with label Snacks. Show all posts

2.20.2013

Warm Bacon Cheeseburger Dip


I made this Cheeseburger dip a couple weeks ago, per the request of you-know-who. He had been asking me to make him something with a cheeseburgery theme to it and it took me a little while to finalize this recipe, because it seemed like there were so many directions to go in. I made this for a Superbowl party that we hosted and I'm just now getting around to writing it because it's been a crazier than normal couple of weeks. We're now in the thick of our wedding planning and reaching the midpoint. Tomorrow marks our 100 day countdown until we say our "I do's" and I get to be Mrs. Burger Boy! In between one of the busiest couple of months The Skinny Beet has had to date, we are finalizing the band, creating centerpieces and selecting invitations and with each detail, our wedding becomes more real. 


This past weekend, the real icing on the proverbial Wedding Cake (or in our case, French Macaroon) was the fact that I had my bridal shower. Expertly hosted by my lovely Sister, Mom (and even Dad had a hand in it) some of my nearest and dearest brunched with me, sipped mimosas and watched me unwrap toasters, new towels and wine glasses. The whole day was surreal and it hit me, I'm getting married! In talking more about my upcoming nuptuals to my burger-lover for life, it only seems fitting to provide a recipe for Cheeseburger Dip. 


When I set out to make this, I wasn't really sure what to expect. Obviously the point was to mimic a burger but make it into an ooey-gooey cheesy and scoopable form. I started by making a simple roux (butter and flour mixture) then added sharp cheddar cheese and a little Worcestershire, Ketchup and Mustard, which give it that "burger" taste. Already browned ground beef get added to the mix before some briny pickles are mixed in. You could, of course top the whole thing off with lettuce and tomatoes (or whatever other burger fixin's you fancy) or just leave it as is. Serve with Sesame Rounds (sliced and toasted sesame bread) or tortillas, Pita Chips, etc. Surprise the burger-lover in your life with this fun dip or just make it for yourself :) 

Warm Bacon Cheeseburger Dip 

- Olive Oil for the pan
- 3/4 pound ground beef
- 1/2 Onion, cut into half-moon sized slivers
- 1/2 stick butter
- 1/4 cup all-purpose flour
- 1 cup whole milk (more if needed)
- 2 cups shredded sharp cheddar cheese
- 3-4 slices of American Cheese
- A couple splashes of Worcestershire Sauce
- 1 TBS Keptchup (a little more if desired)
- 1/2 TBS Mustard (a little more if desired)
- 1/2 cup Kosher Dill Pickles, divided
- 2-3 pieces cooked, crumbled bacon 
- Salt, to taste
- Sesame Rounds, Pita Chips or Tortilla Chips for dipping

In a medium, cast iron skillet (or regular skillet), heat just enough olive oil to coat the skillet. Add the ground beef and brown. Once meat is browned, remove from skillet and set aside. Drain skillet of any excess fat. Add the onions and heat on medium-low heat until they are caramelized and very soft. Add the butter and flour, stirring to combine. Heat for a minute or two until the roux starts to smell nutty. Add the milk and stir to combine. Add the cheese and heat until it's melted. You should be left with a thick sauce. If the sauce is too thick, add a little more milk. Add the ground beef to the skillet along with the Worcestershire, Ketchup and Mustard. Finally, add half of the pickles and adjust the seasoning. Garnish with remaining pickles and bacon. Serve immediately or refrigerate until ready to serve. 

11.27.2012

Cinnamon-Vanilla Bean Biscotti

Cinnamon-Vanilla Bean Biscotti paired with a mug of Vietnamese Coffee
I do have a list of things that I want to make, try, or perfect at home and it seems that with every cookbook I read or food show I watch, I keep getting further and further inspired and thus, my list grows longer. There's quite the range of items from classic, from global influences, classic dishes or even just different spices and blends I want to try. I also have a nice space devoted to just combinations of things that I think might work or that I'm curious about and I turn to it often, especially when I feel like I'm in a cooking rut.


My list lives in this super cute notebook with pictures of jams, jarred and pickled items on the front that makes me happy every time I look at it. Lately I've been on a roll with my list and in the last couple of weeks I've made a classic Rye Bread, Moussaka and Monte Cristo Waffles. Also taking up residence on my list (and for quite some time I might add) has been to create my own Biscotti recipe.


I had done a lot of research on Biscotti recipes and, to my surprise, they're quite simple to make. Mix flour with softened butter, eggs and sugar and then add in whatever else you want, including nuts and dried fruit or chocolate. You bake it once as a big log and then let it cool, slice, and bake it again to gt crisp individual biscottis. I decided to keep things simple on this run, just sticking with some vanilla bean, lots of cinnamon and a bit of allspice. I also found that using Turbinado sugar made for a nice crackly finish and hearty little bite. While I think I could use a little more practice on shaping biscottis, I love the irregularity of this batch and the taste, well, that speaks for itself.


Cinnamon-Vanilla Bean Biscotti 

- 2 eggs
- 1 stick unsalted butter, softened
- 3/4 cup Turbinado sugar
- 2 cups all-purpose flour
- 1 1/2 tsp Baking Powder
- 2 TBS Cinnamon
- 1 tsp Allspice
- 1 Vanilla Bean, split lengthwise, seeds scraped out
- Pinch of Salt

Preheat the oven to 375. Line a baking sheet with parchment paper and set aside. Using a stand mixer or hand blender, blend eggs, butter and sugar until well incorporated. In a separate bowl, combine flour, baking powder, cinnamon, Allspice, the Vanilla Bean Seeds and pinch of salt. Mix until well combined and then add half of the dry mixture to the wet mixture and blend. Add the rest of the dry mixture and blend until the dough just comes together. Roll out the dough into a flat log. Bake the dough on the parchment lined baking sheet until the dough is cooked through and just beginning to turn golden brown (about 30-40 minutes). Remove from the oven and let cool for about 20-30 minutes. Once it's cool enough to handle, but still a little warm, slice the log into 1 inch slices and bake for another 20-30 minutes, or until the biscottis are crisp and golden brown. Remove from oven and let cool before eating. Store in an airtight container.

10.23.2012

Spiced Pumpkin and Hard Cider Spring Rolls

Spiced Pumpkin and Hard Cider Spring Rolls
I made these Baked Pumpkin and Hard Cider Spring Rolls last weekend for us to snack on while we spent a very, and much needed, relaxing day in sweatpants, watching football and loosely working on wedding plans. Wedding planning for me has been such a surreal process. I mean, I've been thinking about my wedding my whole life. Not in a crazy, I have a lace-lined-binder-detailing-every-minute-of-the-day sort of way, but more in just a way thoughtful and hypothetical type of way and now it's real and we're actually planning it!

Our plans are starting to come together and for the most part it's been a really fun process. We still have lots of loose ends to tie up but I can't wait to share some of the details with you. Since we're both chefs, the main focus of our day will be food, which will coincidentally be the theme of the day; after all, it's what brought us together and what we bond over the most, why not share that with our friends and family as we bring the two sides together?

Dipping Action
Getting back to the food at hand, these Spring Rolls involve some of my favorite fall flavors - pumpkin (after all, what's fall without a fun pumpkin recipe?), hard apple cider, roasted fennel, currants and an extra sharp cheddar cheese to really bring it all together. If you find yourself being turned off to making these because you're not into fennel, fret not, just leave it out. You could also make these totally vegetarian spring rolls by omitting the chicken and you can add more roasted veg (I think roasted sweet potatoes, squash and/or parsnips would go especially well). For best results, pair with an ice cold hard cider or other fall-like beverage of your choosing. One extra note - this recipe makes a lot of sauce and that's a good thing. I saved the sauce and then later that week I crisped up some prosciutto and caramelized some onions and added some goat cheese crumbles and made a pizza. I had planned to take pictures of that too, but it got eaten up before I had the opportunity to grab my camera! I'll be making this again for sure though..

A peek inside..

Spiced Pumpkin and Hard Cider Spring Rolls

- Drizzle of olive oil
- 2 chicken breasts
- 1 fennel bulb, fronds removed and bulb thinly sliced
- 1/4 cup currants
- 1 cup Boiling water
- 1 cup of Pumpkin and Hard Cider Sauce, divided (recipe follows)
- 1 cup shredded Sharp Cheddar Cheese
- Salt and Pepper to taste
- 1 package Spring Roll wrappers (usually found in the refrigerated section of most grocery stores)
- 1 egg, plus a splash of water

Pre-heat the oven to 400. In a large skillet, heat olive oil. Salt and pepper both sides of each chicken breast and sear the chicken for about 3 minutes on one side, flip and then finish cooking in the oven. (About 15 minutes, or until chicken is cooked through). Set aside to cool.
Add sliced fennel to parchment lined baking sheet. Drizzle with olive oil and season with salt. Roast fennel until it gets very soft and turns brown on the edges. Remove and set aside to cool. Meanwhile, in a small bowl, re-hydrate the currants by adding boiling water to them and setting aside until they plump. Drain them and discard water.
Drop oven temp to 350. Shred the chicken and add the fennel and currants. Mix in half of the Pumpkin and Hard Cider Sauce. Add shredded cheese and blend, then season to taste and roll (according to package instructions) the spring rolls. Lay onto parchment lined baking sheet. In a small bowl combine egg with a splash of water and blend to make an egg wash. Brush the exterior of each spring roll with the egg wash and lightly salt the exterior. Bake them until they are golden brown on the edges. Serve warm with a side of remaining Pumpkin and Hard Cider Sauce.

Pumpkin and Hard Cider Sauce

- 2 bottles hard cider
- 1 can pumpkin puree
- 1 TBS ground cinnamon
- A couple pinches of freshly grated nutmeg
- 1/4 cup creme fraiche or sour cream
- 2 fresh sage leaves, minced
- Pinch of chili powder
- Salt to taste

In a medium-sized pot, add all ingredients, stir until well combined and heat until the alcohol has cooked out. (About 15 minutes). Season to taste with salt. 

11.28.2011

A Duo of Roasted Dips: Beet and Parsnip

Roasted Parsnip Dip with Sweet Potato Chips
Like every year prior to this, my family and I each have our own roles in the Thanksgiving day festivities. My Dad leads the charge on the turkey and stuffing front while my sister handles things in the potato department, contributing her sweet potato casserole and whipping up the mashed potatoes in addition to making the desserts. My Mom is our interior decorator, setting a fancy table scene fit for a king, all while she makes a classic green bean casserole. I am left to snack detail, and since I don't take my responsibility lightly, I like to challenge myself to try new things and change it up each year to keep things interesting. A couple of this year's appetizers were inspired by some of Ana Sortun's recipes from her book Spice, Flavors of the Eastern Mediterranean as well as influenced by seasonal ingredients and flavors. I made two dips, the first, a roasted parsnip dip, served with sweet potato chips and the second one, a vibrant beet dip with toasted bread.

Roasted Beet Dip
Roasted parsnips are the unexpected star of the first dip, sweet and with a nuttiness and a natural nutmeg flavor to them, when pureed with fresh rosemary and oregano and a couple splashes of milk, the end result is quite tasty. Smooth and luxuriously creamy, it's a perfect accompaniment to crispy sweet potato chips. The second dip also features something that doesn't make frequent appearances on the dip front - beets. Once they are roasted, they are grated and mixed with Greek yogurt to create something that the eye can't help but be drawn to. Lemon juice and zest perk up the flavors and fresh parsley rounds everything out, creating a beautiful contrast of colors.

Roasted Parsnip Dip
Not only are these dips something a little different, they're super easy to make, with most of the flavors being attributed to the caramelization that happens when the vegetables are roasted and force all of the sugars to the surface, concentrating their flavors and making them naturally flavorful. Give 'em a try..

Roasted Parsnip Dip
- 4 to 5 parsnips, washed, peeled and cut into even sized pieces
- 1 sprig of fresh rosemary, leaves removed and minced
- 1 sprig of fresh oregano, leaves removed and minced
- Milk - just enough to make the dip come together (I used about 1/4 cup)
- The juice of half a lemon
- A pinch of freshly grated nutmeg
- Salt and Pepper to taste
- Olive oil for drizzling
- Fresh Parsley for garnishing

Preheat the oven to 400 degrees. Put parsnips onto a baking pan and drizzle olive oil, salt, pepper and half of the herbs. Roast the parsnips until they start to brown. In a processor or blender, puree the parsnips with the lemon juice and gradually add the milk until the dip reaches your desired consistency. Add nutmeg and the rest of the herbs. Season to taste and serve with fresh parsley.

Roasted Beet Dip
- 1 large beet, scrubbed clean
- The zest and juice of 1/2 lemon
- 1/4 cup parsley
- 1 - 6 oz. container of Greek Yogurt
- Salt and Pepper to taste

Preheat oven to 400 degrees. Tightly wrap the beet in foil and place onto a baking sheet. Roast for about 40 minutes or until a knife can easily slide in and out of the beet. Once it is cooked through, set it aside until cool enough to handle. Using paper towels, gently rub the skin of the beet off and carefully grate it with a box grater. Add the yogurt to the beets and blend thoroughly, adding the zest and juice. Season to taste and add the parsley right before serving, reserving one piece for garnish. 

11.08.2011

Oven Roasted Tomatoes on Polenta "Flatbread"


At the height of summer I find that I'm a surrounded by tomatoes so fragrant I'd like to bottle it up and wear it as perfume. But then it's deep into fall and I'm trying to ignore that our days are getting shorter and chillier and it's back to crappy, dull tomatoes. While, for the most part, my recipes and cooking are based around what's in season, to say that I don't crave something at an off-season time and  find a way to work it into my meals would be a stretch of the truth. It's impossible for me to banish tomatoes until next summer so instead, I try to find a way to make them the most flavorful they can be, in-season or not.


Roasting tomatoes is a great way to force all of those sugars within the tomato to concentrate and, when done low and slow for an extended period of time, the results get even better - jammy, sweet and the perfect way to satisfy that tomato craving out of season. Simply slice your tomatoes in half (or you can even leave them whole) and place them onto a sheet pan. Drizzle with olive oil and a healthy pinch of salt and a couple pinches of pepper and then it's into the oven. Sometimes, before the pan goes into the oven, I'll drape thyme or rosemary delicately on top of the tomatoes, just to help give my tomatoes an extra boost of flavor.


While roasted tomatoes can be used in an innumerable amount of ways, I like them best on a flatbread. Layered with other meats and then scattered with a variety of cheeses, I think that an added layer of sweetness gives my flatbread a touch of something extra special. For this particular flatbread, instead of going traditional, I made my flatbread "dough" out of cheesy, herbed polenta that I spread onto a sheet pan before crisping it up and then adding my beautiful roasted tomatoes, shreds of cheese, slices of pastrami and fresh parsley. The base of the flatbread was delightfully crispy and poppy in the way that only polenta can be while the center was still soft. While I do think this took a little more time than you're average flatbread and probably isn't your best bet for an easy weeknight dinner, this is something extra special that you can throw together when friends come over. Especially since the majority of the cooking is hand's free and a lot of it can be made in advance and of course you can interchange toppings, but why not give the roasted fall 'mater a try?


Oven Roasted Tomatoes on Polenta "Flatbread"
- 1 1/2 cup Cornmeal
- 1 pint cherry tomatoes (any tomato works well here too!)
- 4 sprigs of fresh thyme
- 2 sprigs of fresh rosemary, finely minced
- 2 cups cheese, divided (I used a mix of cheese bits that were in the fridge, really, you can't go wrong!)
- 4-5 slices pastrami, thinly sliced
- Olive oil for drizzling
- Fresh parsley, chopped
- Salt and Pepper to taste

Preheat the oven to 300 degrees. Half tomatoes if desired and and place them, skin-side down onto a baking sheet. Drizzle with olive oil, sprinkle with salt and pepper. Lay thyme on top of tomatoes. Roast tomatoes for about 3 hours or until softened and starting to brown around the edges. Remove from oven and set aside.

In a pot, add polenta and rosemary to a pot. Cover with water, add a generous pinch of salt and bring to a boil, then reduce to simmer. You may need to add more water as the polenta cooks. If it starts to stick to the bottom, add a little more water. Once the the polenta has softened, add the cheese and stir to combine. Season to taste. Coat a parchment lined baking sheet with butter or olive oil and spread the polenta out in an even layer. Chill for at least 30 minutes or until ready for use.

Remove polenta from the fridge and lightly coat with olive oil. Place under the broiler and broil for about 10 minutes, or until the outside crisps. Drop the heat to 400 and remove the polenta from the oven and top with cheese, tomatoes and pastrami. Bake for another 5 minutes or until the cheese melts. Top with fresh parsley and salt. Serve immediately.

10.11.2011

Spiced Port Fig Jam


The other day, I made a spiced port fig jam for a dinner party that we were catering and I couldn't wait to share the recipe with you. Ripe with spiced fall flavors, it's perfect for slathering on bread, topping with yogurt or simply eating on its own with a spoon. For the dinner party, we topped a crisped round of bread with a paper thin slice of prosciutto a generous dollop of the jam and a drizzle of balsamic reduction - It was a hit!

Figs are in season right now and are absolutely beautiful. Soft and pear-shaped, once cut into, they reveal a center that is full of little seeds. These seeds are what makes figs so enjoyable; popping and delicately snapping with each bite, they provide a special texture to whatever it is you're making.


The jam is made very simply; the figs are de-stemmed and quartered and then put into a small pot that is heating on the stove. Then, a bit of port is added (I had this beautiful Blackberry Port on hand) and along with some sugar and spice, the entire delicious mess is simmered and and reduced to a thick and jammy consistency. The jam is then set aside to cool before it's ready for eating. Fig jam is by no means a new kitchen concept but I believe that all fig jams are not created equal and I attribute the port and the classic fall spices to what makes this jam stand out. My only advice to you, if you make this, is that you double the recipe. This stuff will go quickly..


Spiced Port Fig Jam
- 8-10 figs (either green or black)
- 1/2 cup sugar
- 1/4 cup Port wine
- 1/2 tsp fresh chopped sage
- 1/4 tsp fresh chopped rosemary
- A hefty pinch of cinnamon
- A pinch of salt

De-stem and quarter the figs and dump into a heated pot. Add sugar and port wine, stirring to combine. Add the rosemary, sage, cinnamon and salt. Stir to combine and over medium-low heat, simmer the jam until it reaches a thick consistency (about 20 minutes). Keep an eye on it and add more port or water if the jam gets too thick. Once the jam has reached the desired consistency, scoop it out of the pot and set aside to cool. Store in the refrigerator.

10.10.2011

Queso Fundito with Roasted Poblano Puree


I think that lounging around on a Sunday with the football on just begs for a hearty snack. In between plays and downs, there should be the sounds of chips crackling. It's just the way it should be. In fact, I'm surprised nobody has made that the an official rule. Maybe someone should get on that?

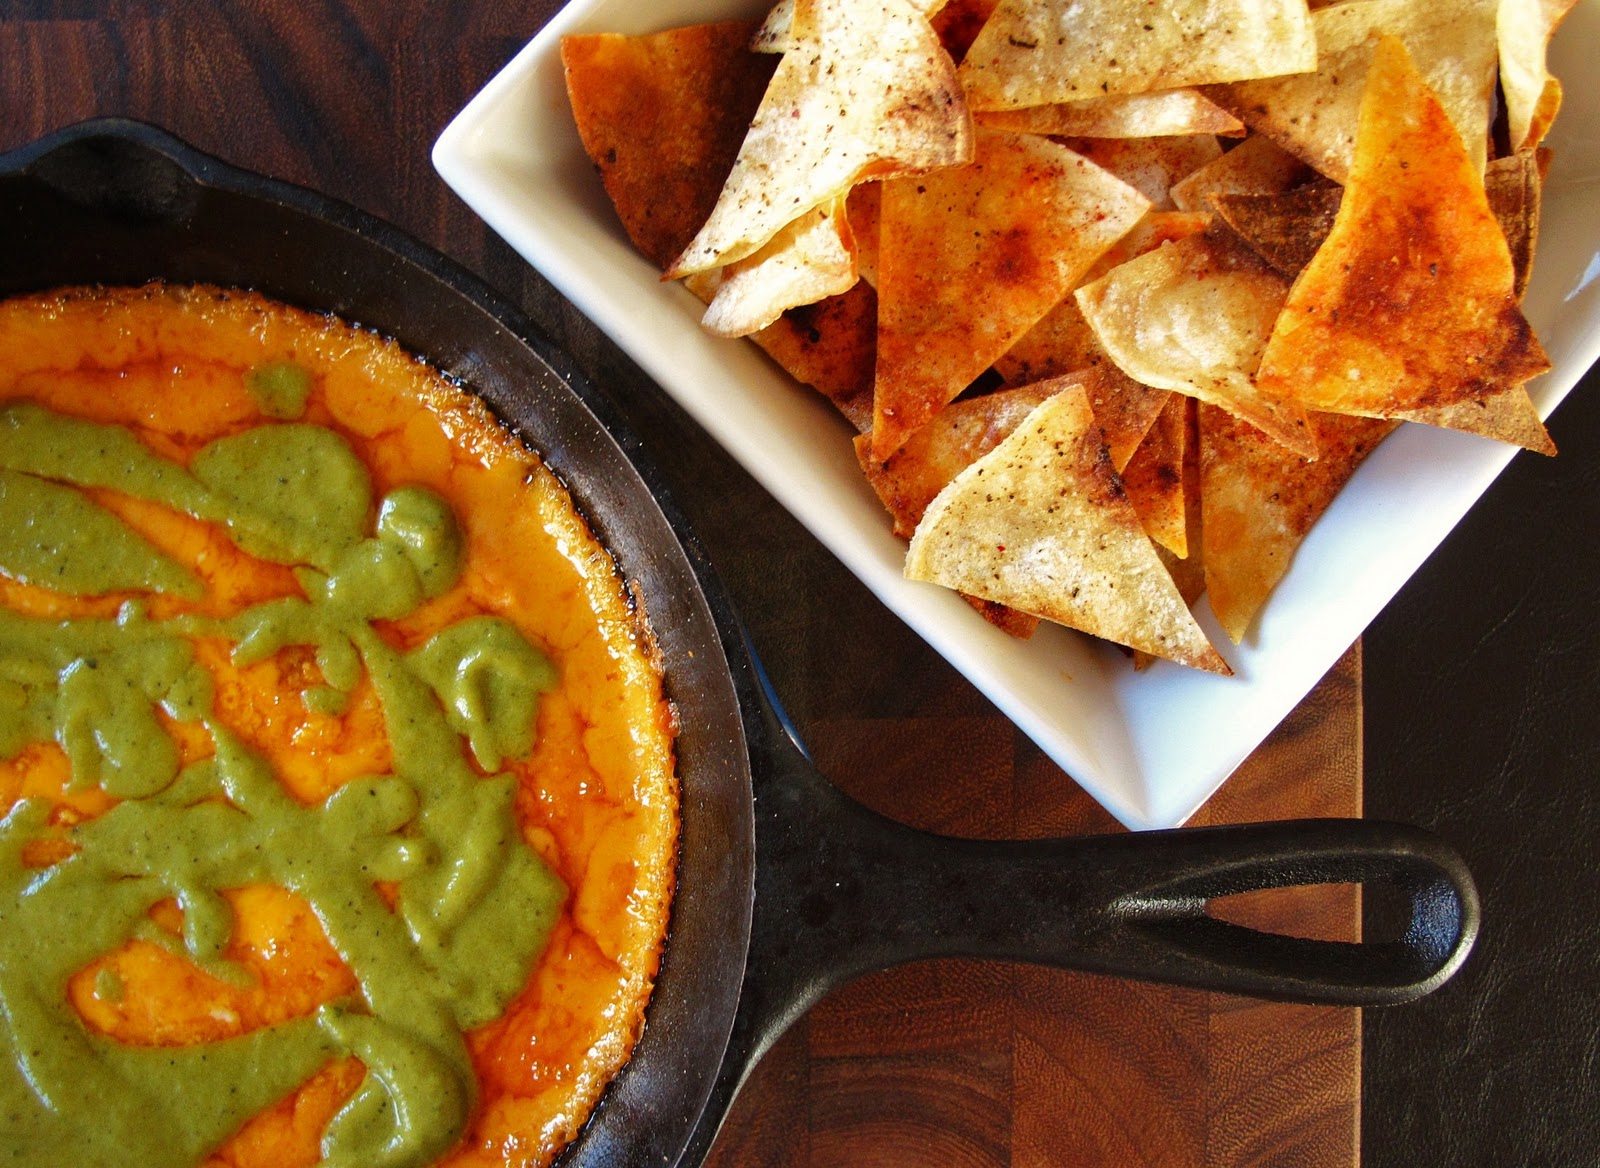
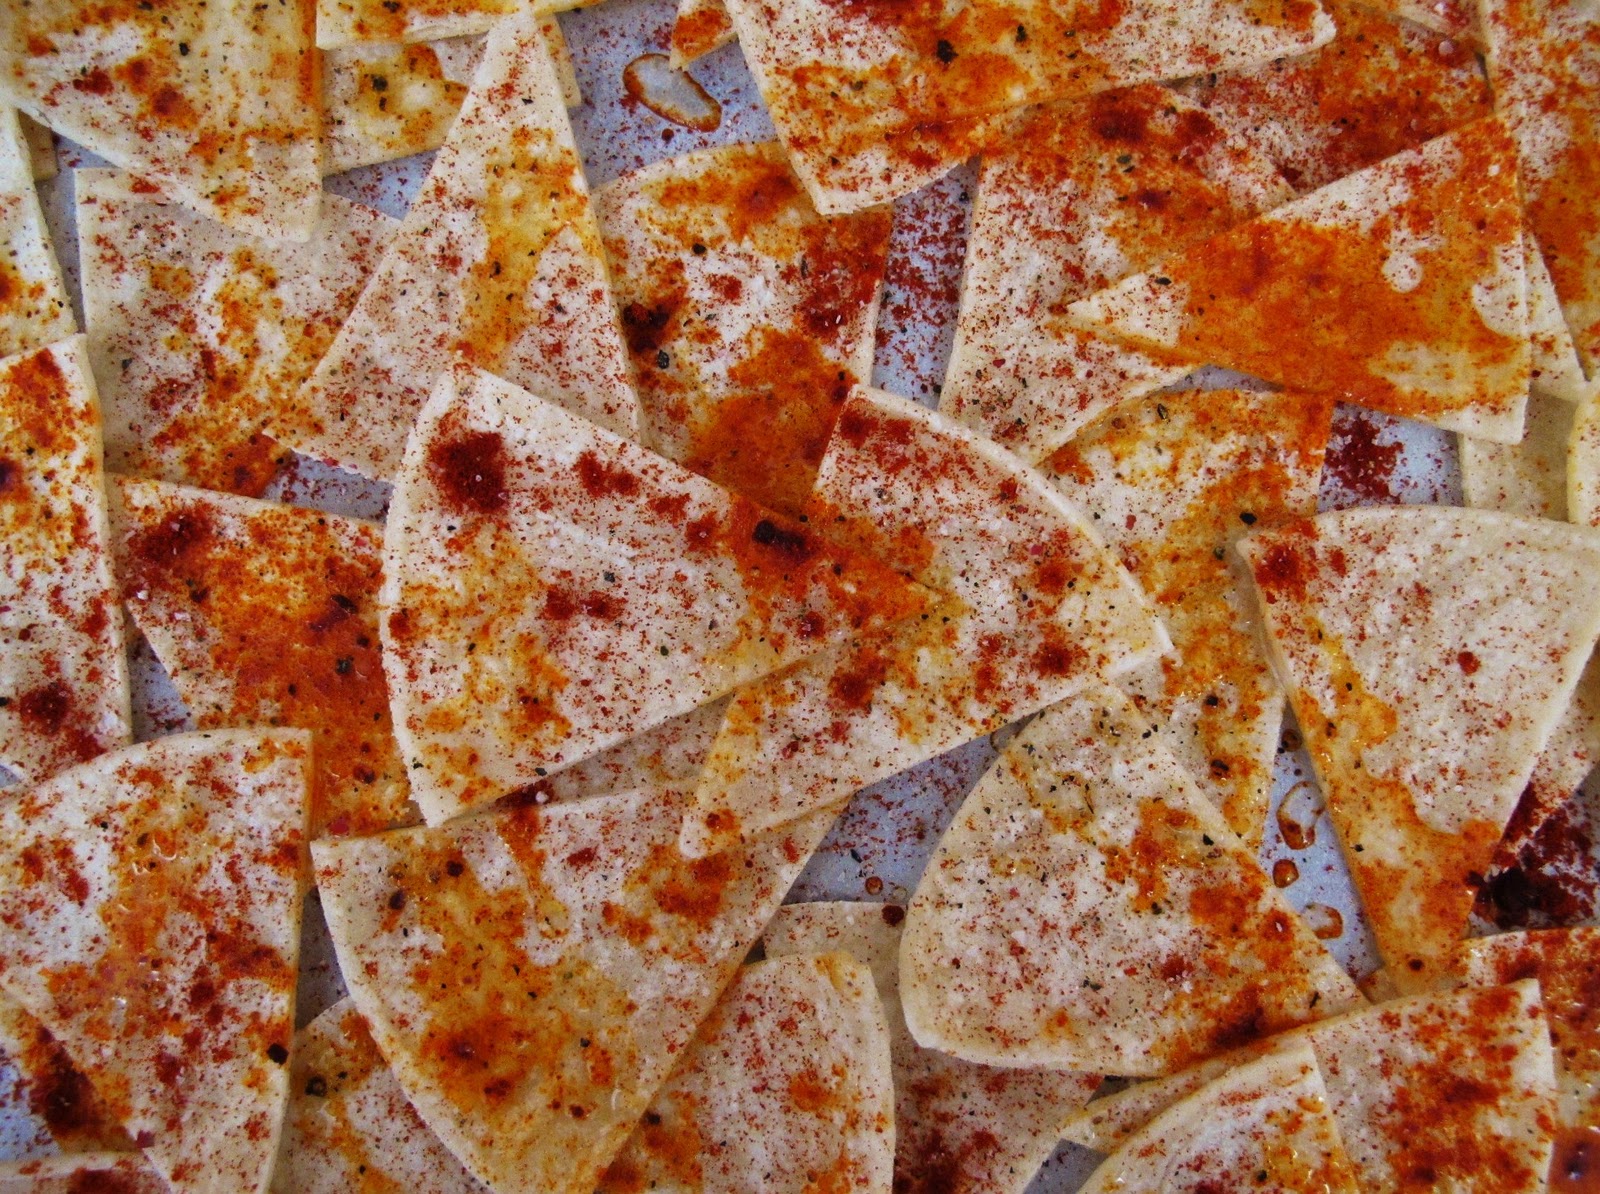
With cheese as the focus (really, when should it not be?) I melted it down into a creamy sauce before spiking it with smoked paprika and pouring it into a small cast iron skillet. The skillet then spent some quality time in the oven, getting hot and bubbly before it was dressed up with a spiced up poblano puree and set to out to rest beside homemade spiced corn chips.


Queso Fundito, or a melted cheese dip, isn't a new concept. It's been gracing our snack tables with its presence for quite some time but it's the simple addition of a bright and spicy puree that just elevates it a bit. I drizzled the puree with a heavy hand because I wanted each chip to have the opportunity to be dipped in the mix of flavors. Of course this could have been made without the puree but with the help of a blender it doesn't take that long to prepare and the outcome is not only quite the eye catcher, but also adds an extra layer of flavor to the party.


Queso Fundito with Roasted Poblano Puree

Queso Fundito 
- 3 TBS Butter
- 3 TBS Flour
- 2 cups shredded Colby Jack Cheese
- 1 TBS smoked paprika
- 1/2 cup milk
- Salt and Pepper to taste

Pre-heat oven to 400 degrees. In a pan, heat the butter until it melts. Add the flour and whisk together until well incorporated. Continue to heat to butter stirring every couple of seconds until the mixture starts to bubble a bit. Add the cheese and milk. Keep stirring until the mixture comes together and is smooth (more milk might be necessary). Pour into a cast iron skillet and then heat in the oven until the cheese starts to bubble. Once it's out of the oven, gently spoon the poblano puree over and serve immediately.

Poblano Puree
- 2 pobalno peppers
- The Juice of half a lime
- 2 TBS Vegetable oil
- 1 TBS red wine vinegar
- Salt and Pepper

Set the oven to broil and place the poblanos on a sheet pan. Roast them, turning them every so often to ensure they brown on all sides. Once they are consistently browned, take them out of the oven and let them cool enough to handle. Once you can handle them, peel the skins and stems and de-seed them. Put the poblano peppers into a blender and combine the rest of the ingredients. Puree the peppers and add a splash of water if the puree is too thick. Season to taste and set aside.

3.28.2011

Hurry Up Spring Radish and Herb Dip


Oh spring. Hurry up and get here, please? We've had enough cold weather and heavy sweaters, hats and mittens.  Please bring on warmer weather, longer and sunnier days and fresh new spring produce. Pretty please? What if I give you a little nudge with a spring inspired dip. Would that help remind you to come to Boston?


This dip was inspired by a craving for lighter fare and something that reminded me of spring.  To me, radishes actually taste like spring, if that makes any sense at all. When they're fresh and young and thinly sliced, they provide a fantastic crunch and a refreshingly sweet earthy and slightly peppery note to a dish.  I also find the contrast of the radish's vibrant fuchsia colored skin against its clean white center to be a fresh and beautiful addition too. With regards to this dip, the chopped radishes provide a slightly pink tinge and their fresh flavor is heightened by some fresh lemon zest.  Adding to that, I used a bunch of fresh herbs because to me, fresh herbs signify spring, especially parsley.  Often times I find that parsley is just haphazardly sprinkled onto a dish at the end just to say that the dish is garnished.  While fresh parsley does provide a beautifully bright hue that perks up an otherwise bland looking dish, I think that the bright and almost slightly citrusy flavor of parsley is so versatile and so under appreciated at the same time.  While you could certainly use dried herbs here, I'd recommend at least using fresh, flat leaf parsley because the flavor of fresh cannot be matched by dried. (My recipe below is for fresh herbs and if you decide to go the dry herb route, just cut the measurements in half.)


What's best is just how easy this dip is to make.  From start to finish it takes about 10 minutes to make.  For best results, make a couple hours ahead or even a day in advance so that all the flavors have more time to come together.  For serving, I thought the crunch of carrots went well with this dip but you could use any fresh vegetable.  You could also hollow out a nice pumpernickel bread to make a bread bowl for this dip or you could serve it with warm slices of baguette.

Spring Radish Herb Dip


2 cups sour cream
6 radishes, cleaned and finely diced
3 TBS fresh parsley, roughly chopped
2 tsp dill, roughly chopped
2 tsp thyme, roughly chopped
2 tsp chives, roughly chopped
Zest of 1/2 lemon
Salt and Pepper to taste

Combine all the above ingredients into a bowl and mix thoroughly to combine. Season to taste and adjust herb amounts to taste.  Serve with fresh, raw vegetables or sliced pieces of bread.

2.05.2011

Superbowl Sunday Snacking

My team might not be suiting up to play this Sunday but that doesn't mean I can't get in on the fun.  After all, isn't Superbowl Sunday the best? Sure, it might loose a little of its appeal when your team isn't in it but it's still a whole lot of fun.  Who wouldn't love a day based around comfortably sitting on your couch, surrounded by friends, cold beer in hand a table full of snacks in front of you?  So the big question is, what to make? To help answer this, I thought I'd give you some of my favorite snack-type recipes that would be perfect to make for tomorrow's big game.  Have fun!

Baked Beer Battered Buffalo Onion Rings
BBQ Pulled Pork Potato Skins
Chipotle Salsa
Creamy Cranberry and Hazelnut Spread
Philly Cheesesteak Dip
Tzatziki 
Chocolate Peanut Butter Rice Krispie Treats
Oh, and PS, for the record, I'm totally rooting for Green Bay.  For no other reason than I love the fact that Packers fans where cheese-shaped hats.  Totally my kind of party hat.  For sure.

1.27.2011

Meat House Demo Recipe: Philly Cheesesteak Dip

The perfect Superbowl snack - Philly Cheesesteak Dip
Isn't Superbowl Sunday the best?  I mean the whole thing takes place on a chilly Sunday evening and the point is to gather your friends and comfortably lounge around the TV in front of giant bowls of Doritos, plates full of saucy buffalo wings holding cups filled to the brim with chilled beer.  I love the casualness of it, the competition, the entertaining commercials...it's totally my kind of holiday! (Even if my team isn't playing in the game...)

Care for a sample of some dip?
Naturally, my absolute favorite part of Superbowl festivities is the food and creating unique snack foods that pair well with ice cold beers and yelling at the TV.  This year, The Meat House in Coolidge Corner asked me to create a recipe utilizing their fantastic array of quality meats and delicious locally sourced ingredients and then do an in-store demonstration.  The inspiration for this recipe came from one of my all-time favorite meals that I made from Meat House ingredients, a basic Philly Cheesesteak.  Simple, yes, but what's not to love? Paper-thin slices of steak fried up and then melted down with sweet onions, fresh mushroom slices and of course, lots of melted cheese.  Yes, please.  Taking that a step further, I deconstructed my basic Philly Cheesesteak recipe and rebuilt it into melty cheesy and meaty dip form (umm, yum, right?)

Delicious meats...rows and rows of it!
For the demo, I used chunks of bread, pita and tortilla chips to help people scoop up delicious hot dip and I thought all of these worked perfectly.  Make no mistake, this isn't a dainty and wimpy little dip, this is a hearty dip that makes a perfect snack for big game day watching.  Just be sure to have lots of napkins handy, it can get a little messy but in my opinion, aren't some of the best dips messy ones?


Big Game Hot Steak & Cheese Dip
Serves 4-6, unless you're really hungry!

- 1 lb Meat House Shaved Steak
- 6-7 large button mushrooms, cleaned and chopped
- 1/2 onion, thinly sliced
- 4 slices of American cheese
- 1 - 8oz. container Pineland Farms Spreadable Cheddar Cheese
- 1/2 cup beef stock or broth
- 4 TBS butter, divided
- Salt and pepper to taste
- 1 TBS chives (optional)
- 1 bag tortilla chips, bagel chips, pita chips or bits of bread for dipping

In a medium-size skillet on medium heat, melt 2 TBS of butter.  Add the onions and pinch of salt to the skillet.  Cook the onions until they become soft and translucent.  Add the mushrooms and cook until browned.  Take the mushrooms and onions from the skillet and set aside.

Melt the remaining 2 TBS of butter in the skillet and increase the heat to high.  Add the steak and fry it quickly on high heat for about a minute or until the edges of the steak start to brown.  Once the steak is heated, remove from the heat and chop it into small bits .  Add the steak back to the pan and reduce the heat to medium-low.  Add the cheddar and American cheese along with the onion, mushrooms and beef stock.  Stir to combine and heat until well combined and the cheese is melted.  Salt and pepper to taste.

Garnish with chives and serve warm with tortilla chips, bagel chips, pita chips or bits of bread.  

1.20.2011

Petite Choux Hors D'Oeuvres Recipe


Yesterday I posted pictures of a tasty little hors d'oeuvres that I had made in school this week and then I never included the recipe.  What a jerk, huh?  So here it is, the recipe for Petit Choux Hors D'Oeuvres, straight from my culinary school notebook.  Although these are a little tricky to make, they are totally worth the effort and will blow your guests' minds (or they will just blow your own mind.  Who says you need a party to make these tasty little guys?)

A couple tips when making these, don't skimp and use dry herbs here.  Fresh herbs are so vibrant and really pop making this a very flavorful appetizer.  Although in school I have to follow the recipes pretty closely, I would also recommend cutting the olives in half.  Or maybe chopping them up a little bit and laying them on top of the cream cheese filling.  Leaving the olives whole makes them not only look like eyeballs (which is fine if that's what you're going for) but I think the whole olive can almost overpower and mask all of the other lovely flavors that are going on in that gorgeously puffy, buttery and herby Pate a Choux!

Enjoy!

Special Note: I don't plan to make a habit out of posting recipes from my Culinary School Notebook (after all, I paid a lot of money for them!) but I will, from time to time, post some of them or provide information from school that I find to be particularly interesting but out of respect for those (like myself) that pay a lot of money to attend a school such as this, I unfortunately won't be posting many specific recipes from my notebook.  


Petit Choux Hors D'Oeuvres
From Cambridge School of Culinary Arts Notebook, copyright Roberta L. Dowling

- 2/3 cup water
- 1/2 cup (4 oz) unsalted butter
- 1/3 cup + 2 TBS milk
- 1/2 tsp salt
- Pinch nutmeg
- 1/4 tsp pepper
- 1 cup flour
- 4-5 large eggs
- 4 oz grated Gruyere cheese
- 2 green onions, minced
- 1 TBS minced parsley
- 1 tsp dill
- Grated Parmesan cheese, to sprinkle on top of piped choux
- 1 egg, well beaten (for egg wash)

Filling:

- 8 oz cream cheese
- 1 1/2 TBS heavy cream
- 1 TBS finely chopped chives
- Pimento stuffed olives

Preheat the oven to 475 degrees.   Bring the water, butter and milk to a boil (be sure the butter melts before the liquid boils).  Meanwhile, combine salt, nutmeg, pepper and flour.  Once the liquid boils, remove pan from heat and add the dry ingredients all at once.  Stir the mixture together with a wooden spoon (it will resemble mashed potatoes) and return the pan to medium heat.  Stir vigorously to dry out pastry (approximately 3-5 minutes).  The paste will be shiny with small beads of butter on the surface of the dough and the pan.  Incorporate the eggs, one at a time, and blend thoroughly  with each addition.  Dough should be soft and cling to the sides of the pan (if it doesn't, add the 5th egg).  Add remaining ingredients (except grated Parmesan cheese), blending well.  Pipe the paste through a 1/2 inch #6 plain tip using techniques of squeezing, releasing and lifting into round puffs, 1 inch in diameter.  Brush with egg wash, sprinkle with grated Parmesan cheese.  Lower the heat of the oven to 375 degrees and bake until puffed, golden brown and firm to a gentle touch.  (About 30-35 minutes).  (Important note: DO NOT keep opening the oven door.  This will prevent them from getting puffy and airy.  Instead, keep the door closed until you think they are ready.)  

To make the filling, beat the cream cheese and cream until well blended.  Fold in chives.  

To assemble, once the Choux has completely cooled, slice in half lengthwise and pipe cream cheese into the center and top with olive.  Serve at room temperature.  

1.09.2011

Nutella Sea Salt Fudge

Nutella Sea Salt Fudge
It seems this weekend I've had an abundance of nervous energy circulating and I've sounded like a broken record saying over and over again in varying tones of excitement, "This is so weird.  This is so weird. This is so weeiird!" I repeated this phrase as I packed up the last of my desk items and gave co-workers a "see you later hug" (I'm bad at good-byes) on Friday.  I continued to say this on Saturday as I tucked away various work clothes and ironed my crisp white aprons that have jet black Cambridge School of Culinary Arts symbols boldly emblazoned on the center.  I said it again as I tried on my kitchen shoes and flipped through my new books and tried getting used to the fact that spending four hours reading cookbooks isn't procrastinating, I actually have to read this stuff and learn it if I wanted to do well in school.  This is so weird!


In addition to this mantra that I've been excitedly repeating, I've been cleaning my apartment like crazy and cooking up a storm. (Two things I tend to do most when I've got a lot of energy).  This recipe for Nutella Sea Salt Fudge came from my friend Kimmy's blog, Lighter and Local.  Involving melting down bittersweet chocolate and my personal favorite, Nutella, and then whipping in a couple more ingredients (you know, all the good stuff like butter and vanilla and a little sweetened condensed milk) until it becomes consistently smooth.  Then this dreamy concoction get topped off by chunky bits of sea salt and then it's off to the fridge to harden.  


The flavor of these is simply amazing.  Cool, creamy chocolate with a punctuating salty pop and just the slightest hint of a Nutella finish.  There's so many delicious flavors going on and they make the perfect compliment to my studying.  Because the fudge is so rich, I like to cut it into little bite-sized pieces so that is almost like a candy rather than a little brick.  I like to pop the whole thing in my mouth and let the chocolate melt on my tongue into a thick velvety pool of rich chocolate.  In addition to the great flavor they provide, their deep chocolaty brown color and dusting of glistening salt crystals make them a great winter treat.  


Now it's back to studying!  

For the Nutella Sea Salt Fudge recipe, click here.  

11.28.2010

Creamy Cranberry Hazelnut Spread

Creamy Cranberry Hazelnut Spread
This might just be one of the easiest dips I've ever created and within minutes of putting it out, it's usually gone.  What's not to love? Soft, warm cream cheese punctuated by tart, chewy dried cranberries and crunchy hazelnuts and then thickly spread over woven wheat crackers with tendrils of swiss cheese falling over the edges.  Um, yum is all I have to say about that.  I created this recipe a couple of Thanksgivings ago and it's my Mom's favorite.  A staple on the snack table from Fall to Spring, my Mom has even been known to ask me to make this for her in the summer.  I can't say I blame her, it's pretty darn good.

Dried Cranberries
I think that this spread works best with wheat crackers (such as Triscut) and I also like to serve it with Rosemary crackers as well (again, I recommend the Rosmary Olive Oil variety of Triscuts).  Or if you prefer, thin slices of toasted baguette can be subbed for the crackers.

Creamy Cranberry Hazelnut Spread

Creamy Cranberry Hazelnut Spread

- 1 package of cream cheese
- 2 tbs milk
- 1/4 cup dried cranberries, chopped
- 2 tbs chopped hazelnuts, divided
- 1/8 tsp grated orange peel
- A couple pinches of nutmeg
- 1/4 cup shredded swiss cheese, divided

In an oven safe bowl, combine the cream cheese milk and cranberries with a fork.  Add 1 tbs of the hazelnuts, the grated orange peel and the nutmeg.  Mix in 1/2 of the swiss cheese.  Flatten the dip into an even layer in the bowl.  Top with the rest of the swiss cheese and bake at 350 for about 10 minutes until the cheese starts to melt.  Once this happens, take out the dip and top with the rest of the hazelnuts.  Bake for an additional 5-7 minutes until the hazelnuts get toasted.

10.20.2010

The Wait For Homemade Pumpkin-Cranberry Granola Bars Is Over!

Homemade Pumpkin-Cranberry Granola Bars
It occurred to me yesterday that I did a pretty mean thing to my readers (sorry!).  On Sunday, via my Facebook fan page, I teased with the fact that my apartment was flooded by the oh so sweet smell of pumpkin-cranberry granola bars that were busy toasting up in the oven.  Then, (here's where the mean part comes in) I didn't post the recipe until a couple days later (meaning, uh, today).  What a jerk, huh?  I left my poor readers in a lurch, waiting for the details and the recipe.  I like to try post my recipes right after I make them but there's always that one, every once in a while, that doesn't get posted right away.  But if it's any consolation, these guys are SO worth the wait!  Crunchy and still soft and chewy at the same time, I've really been enjoying them for breakfast.  On some mornings I'll crumble one up into a cup of all-natural yogurt or I'll just enjoy them on their own.  These are perfect on a crisp fall day, swirled with cinnamon that warms you right up and laced with sweet pumpkin flavor, these rock.

Another added bonus, they take about 30 mins to make from start to finish (This doesn't count cooling time but if you're like me, you're not good at waiting for things to cool!).  Additionally, these as versatile as they are delicious.  Feel free to get a little crazy here and use any dried fruit and nut combination you'd like.  Might I recommend dried apricot and almonds?  Or maybe some dried blueberries and cashews?  Get a little imaginative and experiment with your combinations.  You can also omit the pumpkin if you'd like and you'll end up with a firmer bar.  That being said, no matter how you slice it, these bars are waaaay better than anything you can buy in the store.  Enjoy!


Homemade Pumpkin-Cranberry Granola Bars

- 2 cups oats (I like Quaker the best)
- 3/4 c. wheat germ
- A big handful or two of nuts (I used dry roasted peanuts)
- A big handful of seeds (I like flax the best, they give it a nice subtle crunch)
- A big handful or two of dried fruit (I used dried cranberries) 
- 2 tbs butter
- 2/3 c. brown sugar
- A little less than 1/2 a c. of honey
- 2 tbs pumpkin (I used canned pumpkin)
- 1 tsp vanilla extract
- 1 tsp pumpkin pie spice
- A couple pinches of sea salt
- I also dusted a little bit of cinnamon on top (yum!)

In a wax paper lined baking sheet, toast the oats in the oven at 400, making sure to turn every couple of minutes so that they don't burn. Meanwhile, on the stove, combine butter, brown sugar, vanilla, honey, salt, cinnamon and juice. Cook on medium heat, stirring frequently so that the bottom doesn't burn. Once the oatmeal starts to brown a little, add the nuts, wheat germ, and seeds and put the mixture back into the oven for a couple of minutes. After the mixture has toasted a little, (keep an eye on it so it doesn't burn) add the dried fruit and put aside.

When the brown sugar/butter mixture starts to get a little bubbly and is thoroughly combined, pour over the oatmeal mixture. Working quickly stir the brown sugar/butter mixture with the oatmeal and thoroughly combine. The granola should be a mass of warm sticky yumminess by this point.  When it cools a little, press the granola firmly into the pan and around the entire bottom of the pan.  Bake for an additional 15 - 30 minutes until they reach the desired level of chewiness.


10.11.2010

(Homemade) Pretzel Pahhhty!

Homemade Hard Wheat Pretzels 
Really pretzels, REALLY?!  You're processed!  I would have expected that from snack-food aisle neighbor, the potato chip, but you?  C'mon now, I expected more from you.  Hard, salty little bits of bread all knotted up, you should be more natural!  Shame on you...

Is what I've been thinking this week and I even bellyached a little about it over the weekend as it seems my favorite little snack food is off-limits this month for October: Unprocessed and I've been bummed.  I haven't missed too much by way of other processed items but the pretzel is the exception.  I've missed it dearly, really I have.  So when I posted about it, Mr. Unprocessed himself, Andrew Wilder, responded with "why don't you try making them".  I felt like I was hit over the head with the obvious: why don't I try making them?  I'm a good home cook, I should be able to do this, right?  Baking has to stop intimidating me!

A quick Google search first led me in the direction of soft pretzels and although delicious, it wasn't quite what I was looking for.  I wanted the crackling and crunching that only a good hard pretzel can provide and my search stopped short at a recipe by Alton Brown.  It seemed easy enough and after a quick scan of the ingredients, I realized I had everything on hand that I needed (score!).  With that, I was off to my kitchen to get my bake on.


At about 4 hours latea of watching dough rise, kneading, boiling water, being dusted with flour and with my arms sore from rolling out bits of dough "snake-style", there they were; my first batch of homemade pretzels.  And my were they cute!  Twisted up and dusted with coarse sea salt and crushed dried rosemary (creative liberties), it was nothing like the store bought pretzels, it was way more delicious (does anything store bought ever beat out homemade?)  Tasting sort of like bread sticks, I would't say I'd be able to make them all the time but it's a nice little treat and a great way to help me satisfy my craving in a natural way.   For an added bonus, I even dipped a little coarse ground Grey Poupon on them to add an extra splash of tang.

With just a touch of grainy mustard..
Salty and tangy 

For the recipe, please click HERE.  (Please note, I also used white whole wheat flour and added crushed dried rosemary to mine.)

What's Hot From The Small Boston Kitchen